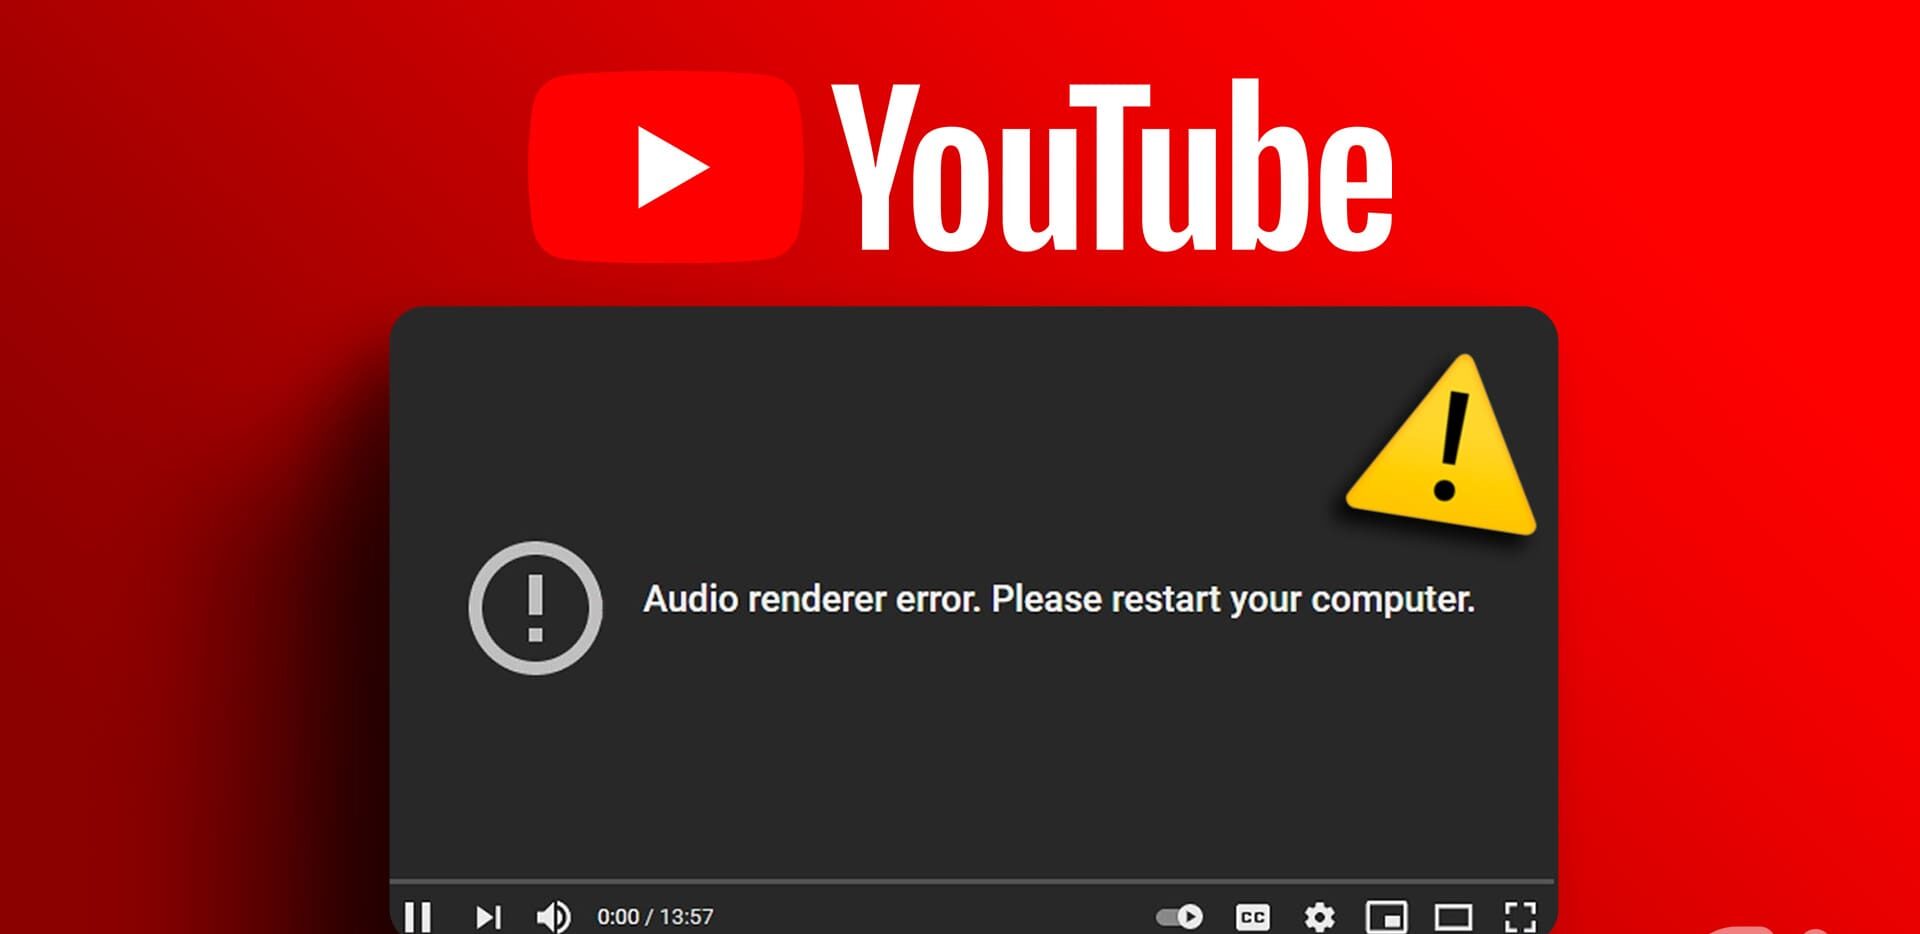
Are you frustrated by the dreaded ‘YouTube Audio Renderer Error: Please Restart Your Computer’ message that pops up when you’re trying to enjoy your favorite YouTube videos? You’re not alone! This error can be a real buzzkill, but fear not, as we’ve got your back. In this comprehensive tutorial, we’ll dive deep into understanding what the Audio Renderer Error in YouTube is, explore its possible causes, and equip you with five effective methods to resolve this pesky issue.
What is Audio Renderer Error in YouTube?
The Audio Renderer Error in YouTube occurs when you’re greeted with a blank screen in the player, accompanied by the ominous message, “Audio renderer error, try restarting your system.” It’s as frustrating as it sounds, but we’re here to help you tackle it head-on.

Possible Causes
Let’s get to the root of the problem. There are a couple of potential culprits behind the Audio Renderer Error in YouTube:
- Software Glitches: One common cause is glitches in the software itself. These issues can often be resolved by keeping your drivers up to date.
- Playback Devices: Sometimes, the error is triggered by conflicts between various playback devices connected to your system.
Ways to Correct the YouTube Audio Renderer Error
Now, let’s delve into the solutions that can help you bid farewell to this annoying error and get back to enjoying your YouTube videos.
1. Reconnect Device
Begin with the basics. Sometimes, the error is as simple as a loose connection between your external device and your system. Reconnect the device to ensure a stable connection before proceeding further.
2. Update Drivers
Outdated sound drivers can be a breeding ground for errors. To prevent further glitches, it’s advisable to update your external device’s sound drivers to the latest version. Here’s how:
- Run the Audio Troubleshooter.
- Click on the Windows button and search for “Settings.”

- Open the Troubleshoot option.

- Select “Find and fix audio playback problems.”
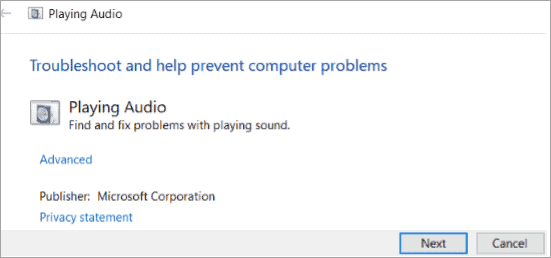
- Let the troubleshooter detect and resolve any sound-related issues.
3. Roll Back Driver
In some cases, a new driver update might introduce bugs, worsening the situation. Rolling back to a previous driver version can be a wise choice. Here’s how to do it:
- Right-click on the Windows Start button.
- Choose “Device Manager.”
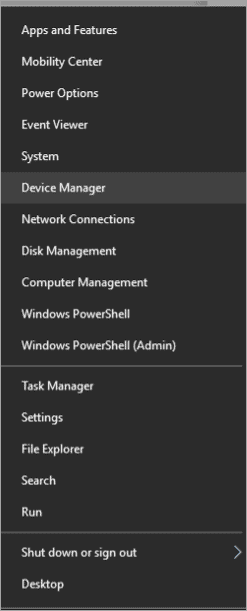
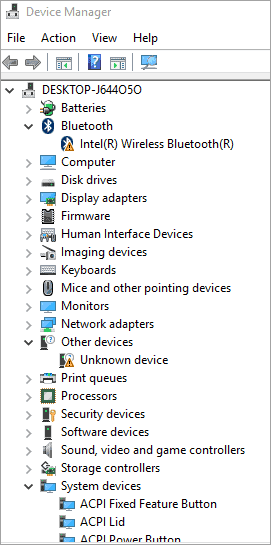
- Select the driver you want to roll back.
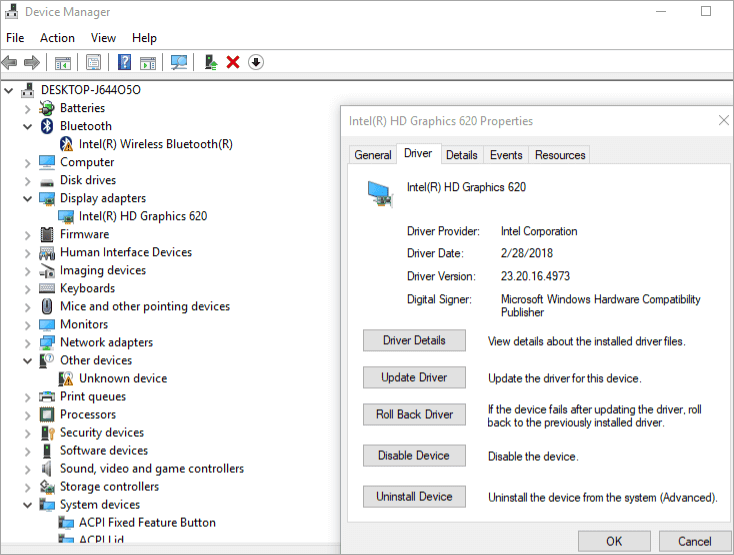
- Click on “Properties.”
- Navigate to the “Driver” tab and select “Roll Back Driver.”
4. Update Driver
Regular driver updates are essential for maintaining a stable system. Here’s how to update your drivers:
- Open “Device Manager.”
- Right-click on the driver you want to update.
- Choose between automatic updates or manual browsing for updates.
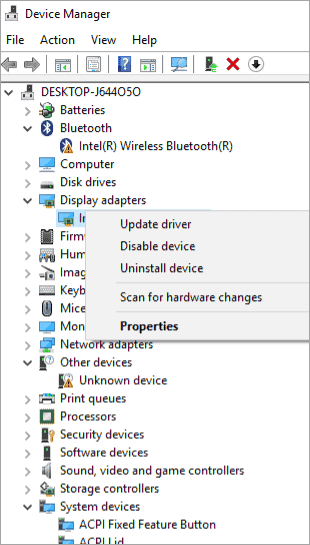
- Let the system search for and install the latest updates.
5. Restart Your Computer
Sometimes, the Audio Renderer Error in YouTube can be a result of system lag or other underlying issues. A simple system restart can often clear these errors and refresh your system.
Frequently Asked Questions
To provide you with even more clarity, here are some common questions related to fixing audio issues:
- Q #1) How to restart Realtek Audio Manager?
- Double click on “Sound, Video, and Audio Controllers.”
- Right-click on the sound driver.
- Click on ‘’Enable to restart the device’’.
- Q #2) How to run Audio Troubleshooter?
- Connect your Audio playback devices.
- Restart your computer.
- Run audio troubleshooting.
- Restart your Audio drivers.
- Update your Audio driver.
- Rollback your Audio driver.
- Set the same sample rate for both the audio driver and the ASIO driver.
- Q #3) Where can you find the playing Audio Troubleshooter?
- The Troubleshooter can be found in the audio settings.
- Click on “Start”.
- Go to “Settings”.
- Click on System -> Sound -> Troubleshoot.
- Q #4) How to uninstall audio drivers in Windows 10?
- Press “Windows + X key” from your keyboard.
- From the pop-up menu select the “Device Manager”.
- Click on “Sound, Video and Audio Controllers”.
- Select the drivers that you want to Uninstall.
- Click on “Uninstall”.
- Q #5) How do you fix an audio driver?
- Open Device Manager.
- Look for the option of Sound Drivers.
- Right-click on the driver and click on Update driver.
- Click on “Browse for drivers update”.
- Select the update you want to install.
Conclusion
In this tutorial, we’ve unravelled the mysteries of the Audio Renderer Error in YouTube. We’ve explored its causes and provided you with a comprehensive set of methods to bid adieu to this frustrating issue. From reconnecting devices to updating drivers, these solutions will have you back to enjoying your YouTube videos without interruption.
This error is often the result of software and driver calibration issues, which can stem from various reasons, including driver bugs or browser glitches. If you encounter this error frequently, consider switching to a different browser to avoid further disruptions.
We hope this guide has been informative and helpful in resolving the Audio Renderer Error in YouTube. Happy streaming!
