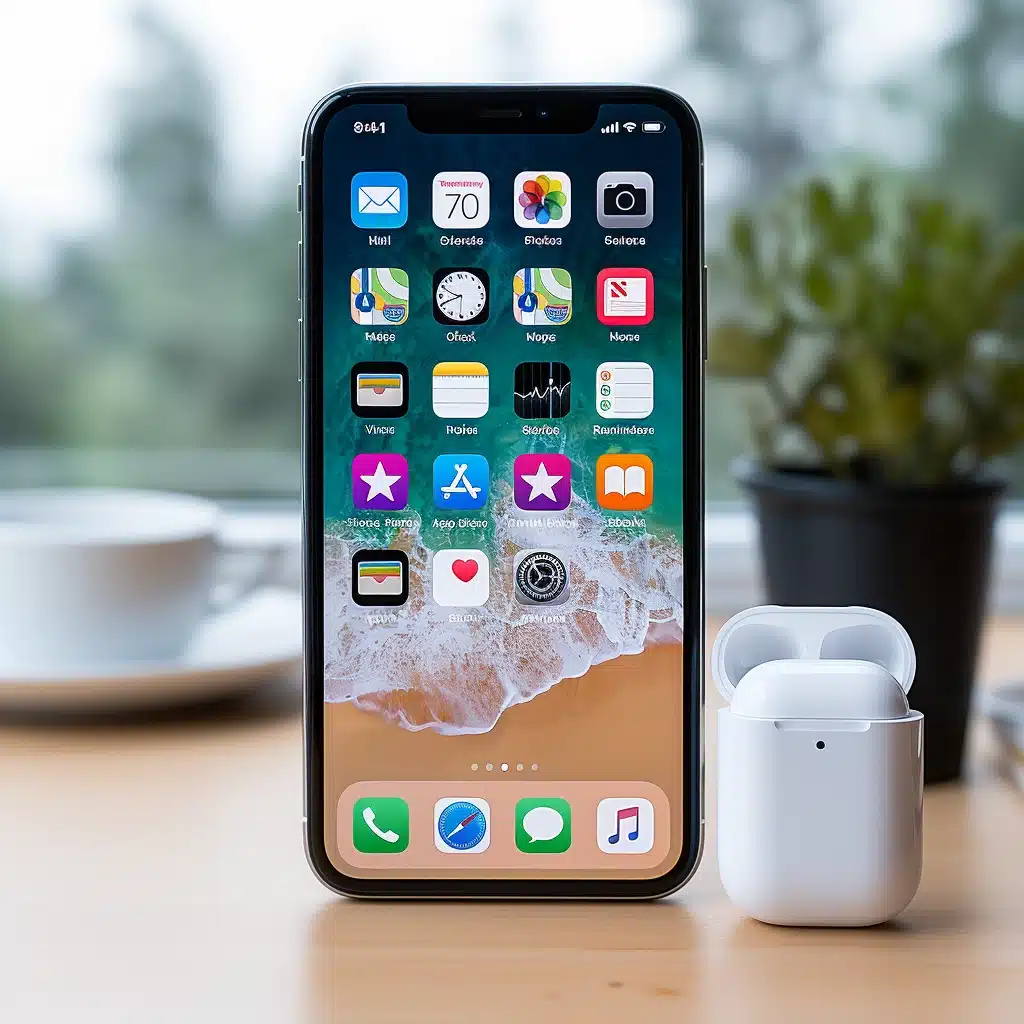
In the fast-paced world of technology, connecting your AirPods to your iPhone should be as seamless as the design itself. However, glitches happen. Fear not, for we’ve crafted a comprehensive guide to ensure you not only connect your AirPods effortlessly but troubleshoot if things go awry.
Ensuring a Smooth Connection
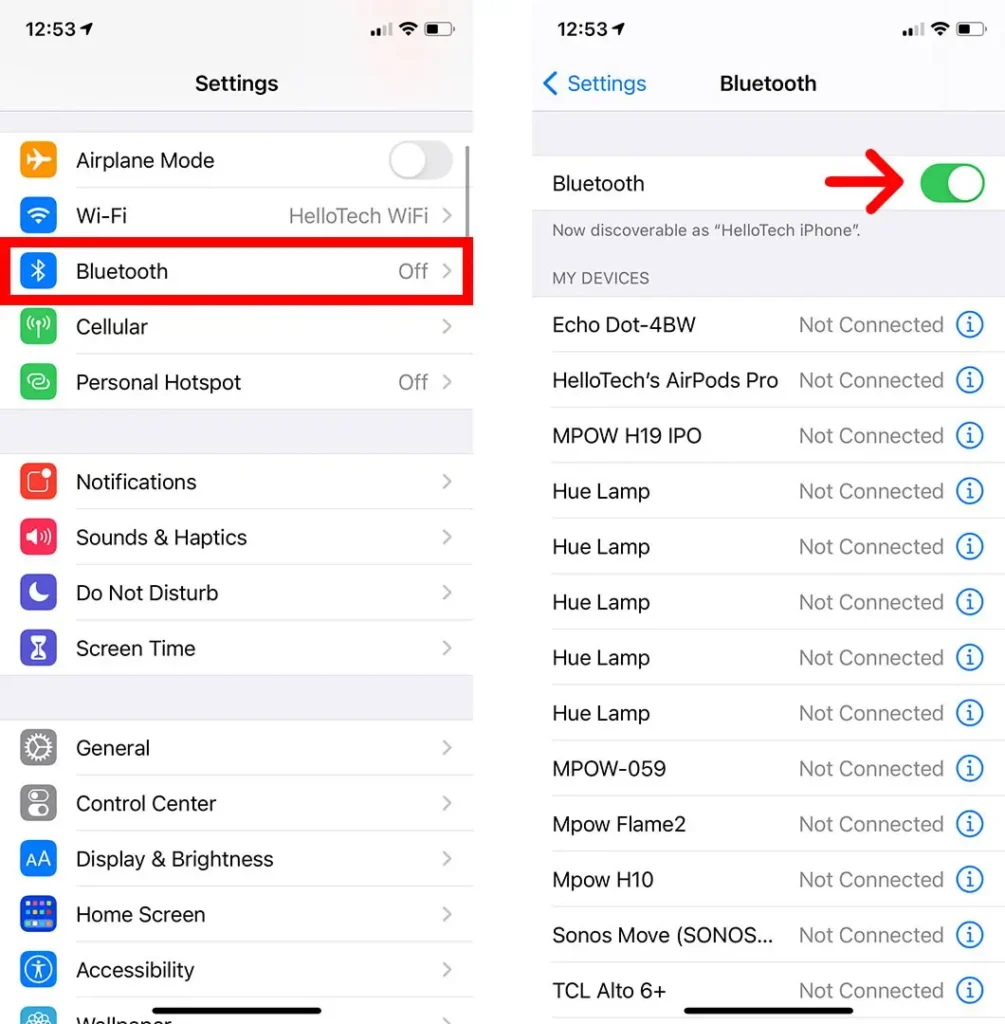
Before diving into the connection process, double-check that Bluetooth is enabled on your iPhone. Navigate to Settings > Bluetooth, and ensure the slider is green.
Connecting Your AirPods
- Place in Case and Close:
- Put your AirPods in their case and close it.
- Keep them in the closed case for 15 seconds.
- Home Screen Access:
- On older iPhones, press the Home button; on iPhone X or newer, swipe up from the bottom of the screen.
- Proximity Connection:
- Open your AirPods case near your iPhone, ensuring proximity for optimal results.
- Tap to Connect:
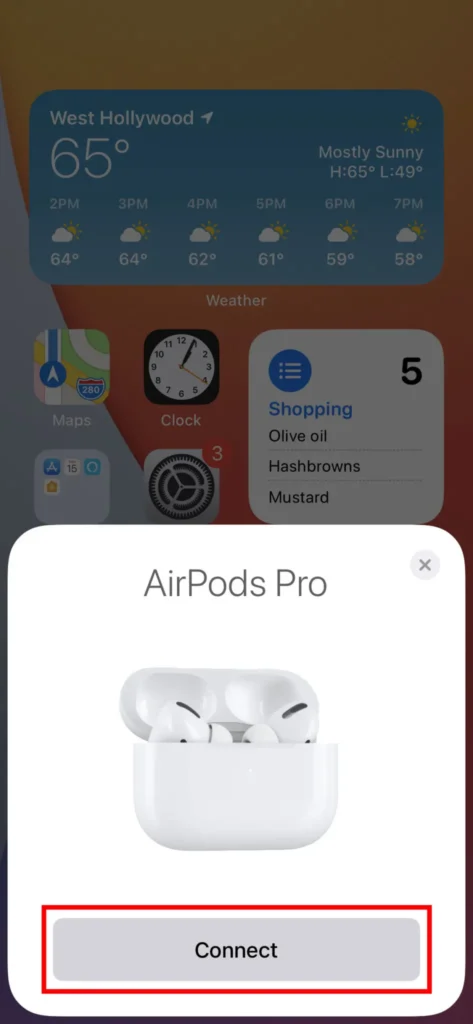
- When the setup prompt appears on your iPhone, tap Connect.
- Follow on-screen instructions, and tap Done to complete the connection.
- Instant Reconnection:
- Once connected, your AirPods should instantly reconnect when placed in your ears.
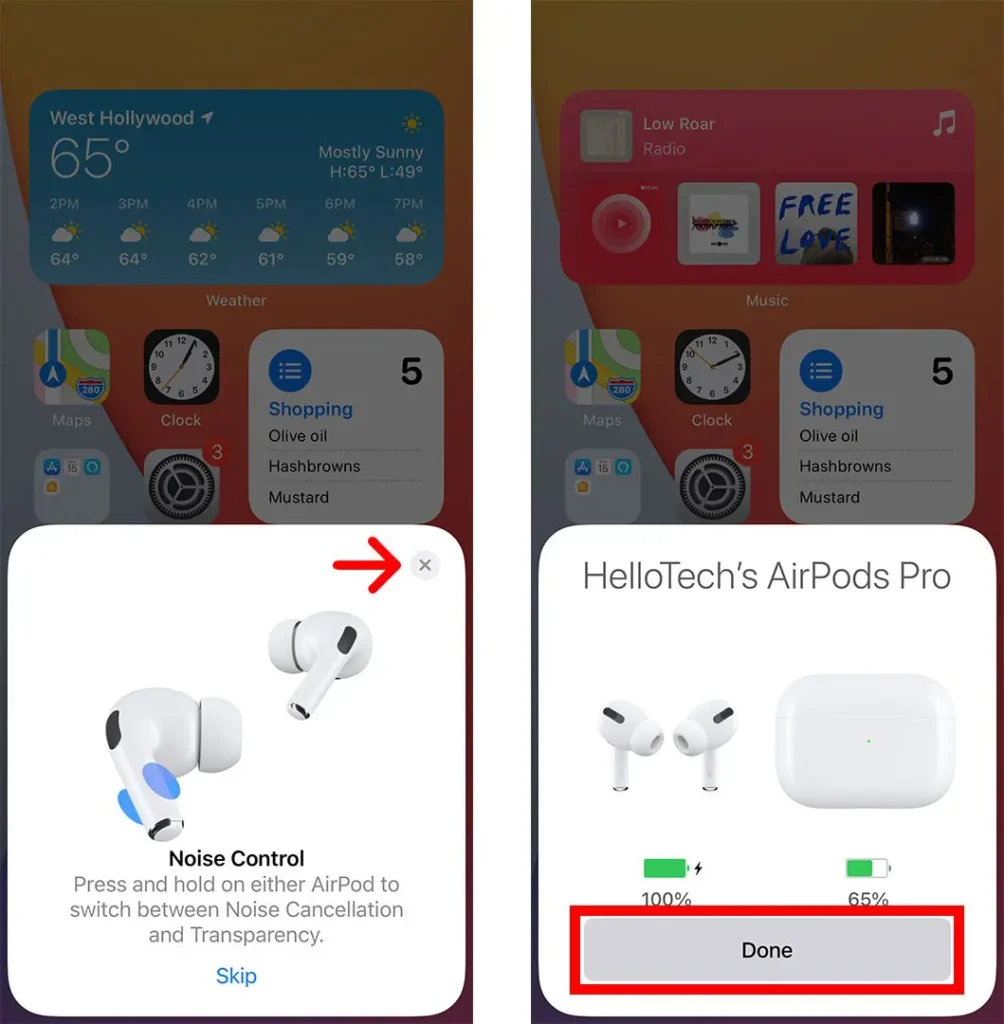
- Once connected, your AirPods should instantly reconnect when placed in your ears.
If the Connect button is elusive, or connection issues persist, let’s delve into manual connection.
Manual Connection Steps
Manually Connecting Your AirPods
- Case and Button:
- Put AirPods in their case and close it.
- Open the case next to your iPhone.
- Press and hold the button on the back until a blinking white light appears.
- On-Screen Connection:
- Press Connect when it pops up on your screen.
Troubleshooting Connection Woes
1. Turn Bluetooth On and Off
- Go to Settings > Bluetooth, toggle off, wait, and toggle on.
- Alternatively, use the Bluetooth icon in the Control Center.
2. Disable Low Power Mode
- Navigate to Settings > Battery and disable Low Power Mode.
- You can also do this via the Control Center.
3. Switch Audio Output
- In Control Center, tap the AirPlay button.
- Select your AirPods from the list for the correct audio output.
4. Disconnect Other Bluetooth Devices
- Go to Settings > Bluetooth.
- Tap the “i” next to the device’s name and select Disconnect or Forget This Device.
5. Reset Your AirPods
- Navigate to Settings > Bluetooth.
- Tap the “i” next to your AirPods’ name.
- Scroll down, tap Forget this Device, and confirm.
6. Update Your iPhone
- Go to Settings > General > Software Update.
- If an update is available, tap Download and Install.
Still facing issues? Let’s explore reaching out to Apple’s customer support.
10 Common Questions and Answers
Q1: Why won’t my AirPods connect?
A: Ensure Bluetooth is on, follow the connection steps, and try troubleshooting steps mentioned above.
Q2: How do I disable Low Power Mode?
A: Go to Settings > Battery and toggle off Low Power Mode.
Q3: Why can’t I hear anything through my AirPods?
A: Check the audio output settings on your iPhone. Open Control Center, tap AirPlay, and select AirPods.
Q4: Should I disconnect other Bluetooth devices?
A: Yes, disconnect or forget other Bluetooth devices via Settings > Bluetooth.
Q5: How do I reset my AirPods?
A: Navigate to Settings > Bluetooth, tap the “i” next to your AirPods, and choose Forget this Device.
Q6: Is my iPhone software up-to-date?
A: Check in Settings > General > Software Update. Download and install if an update is available.
Q7: What if my AirPods Pro won’t connect?
A: Ensure your iPhone runs iOS 13.2 or later. Follow the steps above and update your iPhone.
Q8: Can I use AirPods with iOS versions below 10?
A: AirPods 1 are compatible with iOS 10 and later; AirPods 2 with iOS 12.2 and later.
Q9: Why won’t my AirPods reconnect automatically?
A: Ensure Bluetooth is on, and follow the connection steps carefully.
Conclusion
In the realm of AirPods and iPhones, connection hiccups are inevitable. Armed with this guide, you’re not just connecting; you’re troubleshooting like a pro. Embrace the wireless symphony!
