

Samsung Galaxy S6 is a powerful flagship device full of impressive specs and features. Samsung added a stunning camera on the back along with a heart rate sensor, improved the fingerprint scanner and more. Last week a new Galaxy S6 root method arrived, and here we’ll explain how to root the Galaxy S6 and get even more out of the phone.
Even though the Galaxy S6 is loaded full of features and options, many users still love to root their device for additional functionality or control. Just like jailbreaking an iPhone, last week the Samsung Galaxy S6 and Galaxy S6 Edge on Verizon and AT&T (and other carriers) finally received root access.
Instructions to Root the Galaxy S6
Warning: Proceed at Your Own Risk
Take note that this guide is currently for devices running Android 5.0.2. While most S6s haven’t yet been updated to Android 5.1.1, if yours has, please wait until we’ve updated the article to include the appropriate root files for that version of Lollipop.
Rooting your S6 with this method will trip Samsung’s KNOX counter, which will void your warranty. I repeat, this rooting process will voice your warranty.
Additionally, having a tripped KNOX will more than likely disable Samsung Pay when it’s released later this year. This isn’t 100% known yet, but it is the likely scenario.
While there may be a way to mask the KNOX counter in the future, we wouldn’t count on it. When KNOX is tripped, a physical fuse that resides inside your device is blown. While this doesn’t cause any damage to your device, it is an irreversible way to identify a modified system.
While using Odin with CF Auto Root has been a tried-and-true method for rooting Samsung devices, among others, it doesn’t mean it’s the only method that can grant root-level access. So, if you’d rather not trip KNOX, it may be worth waiting for an alternative.
But, as long as you understand all this, proceed ahead… this is going to be easy.
Step 1: Install the Samsung Drivers
Before you connect your S6 to your Windows computer, make sure that you have the appropriate Samsung drivers installed.
- Samsung USB drivers
Step 2: Extract the MD5 File & Odin
You’ll also have to download a root package onto your computer, which will come with both Odin3 and an MD5 file; the former will differ depending on your device and carrier. Check out the links below for both the Galaxy S6 and the S6 Edge:
Galaxy S6:
- T-Mobile (SM-G920T) root package
- International variant (SM-G920F) root package
- Latin American, Singapore, India, and Australia variant (SM-G920I) root package
- Hong Kong variant (SM-9200) root package
- Sprint users can use the T-Mobile root package
Galaxy S6 Edge:
- Sprint (SM-G925P) root package
- T-Mobile (SM-G925T) root package
- International variant (SM-G925F) root package
- Chinese variant (SM-G9250) root package
Extract the files from the ZIP and place both Odin3 and the MD5 file on your desktop to makes things easier.

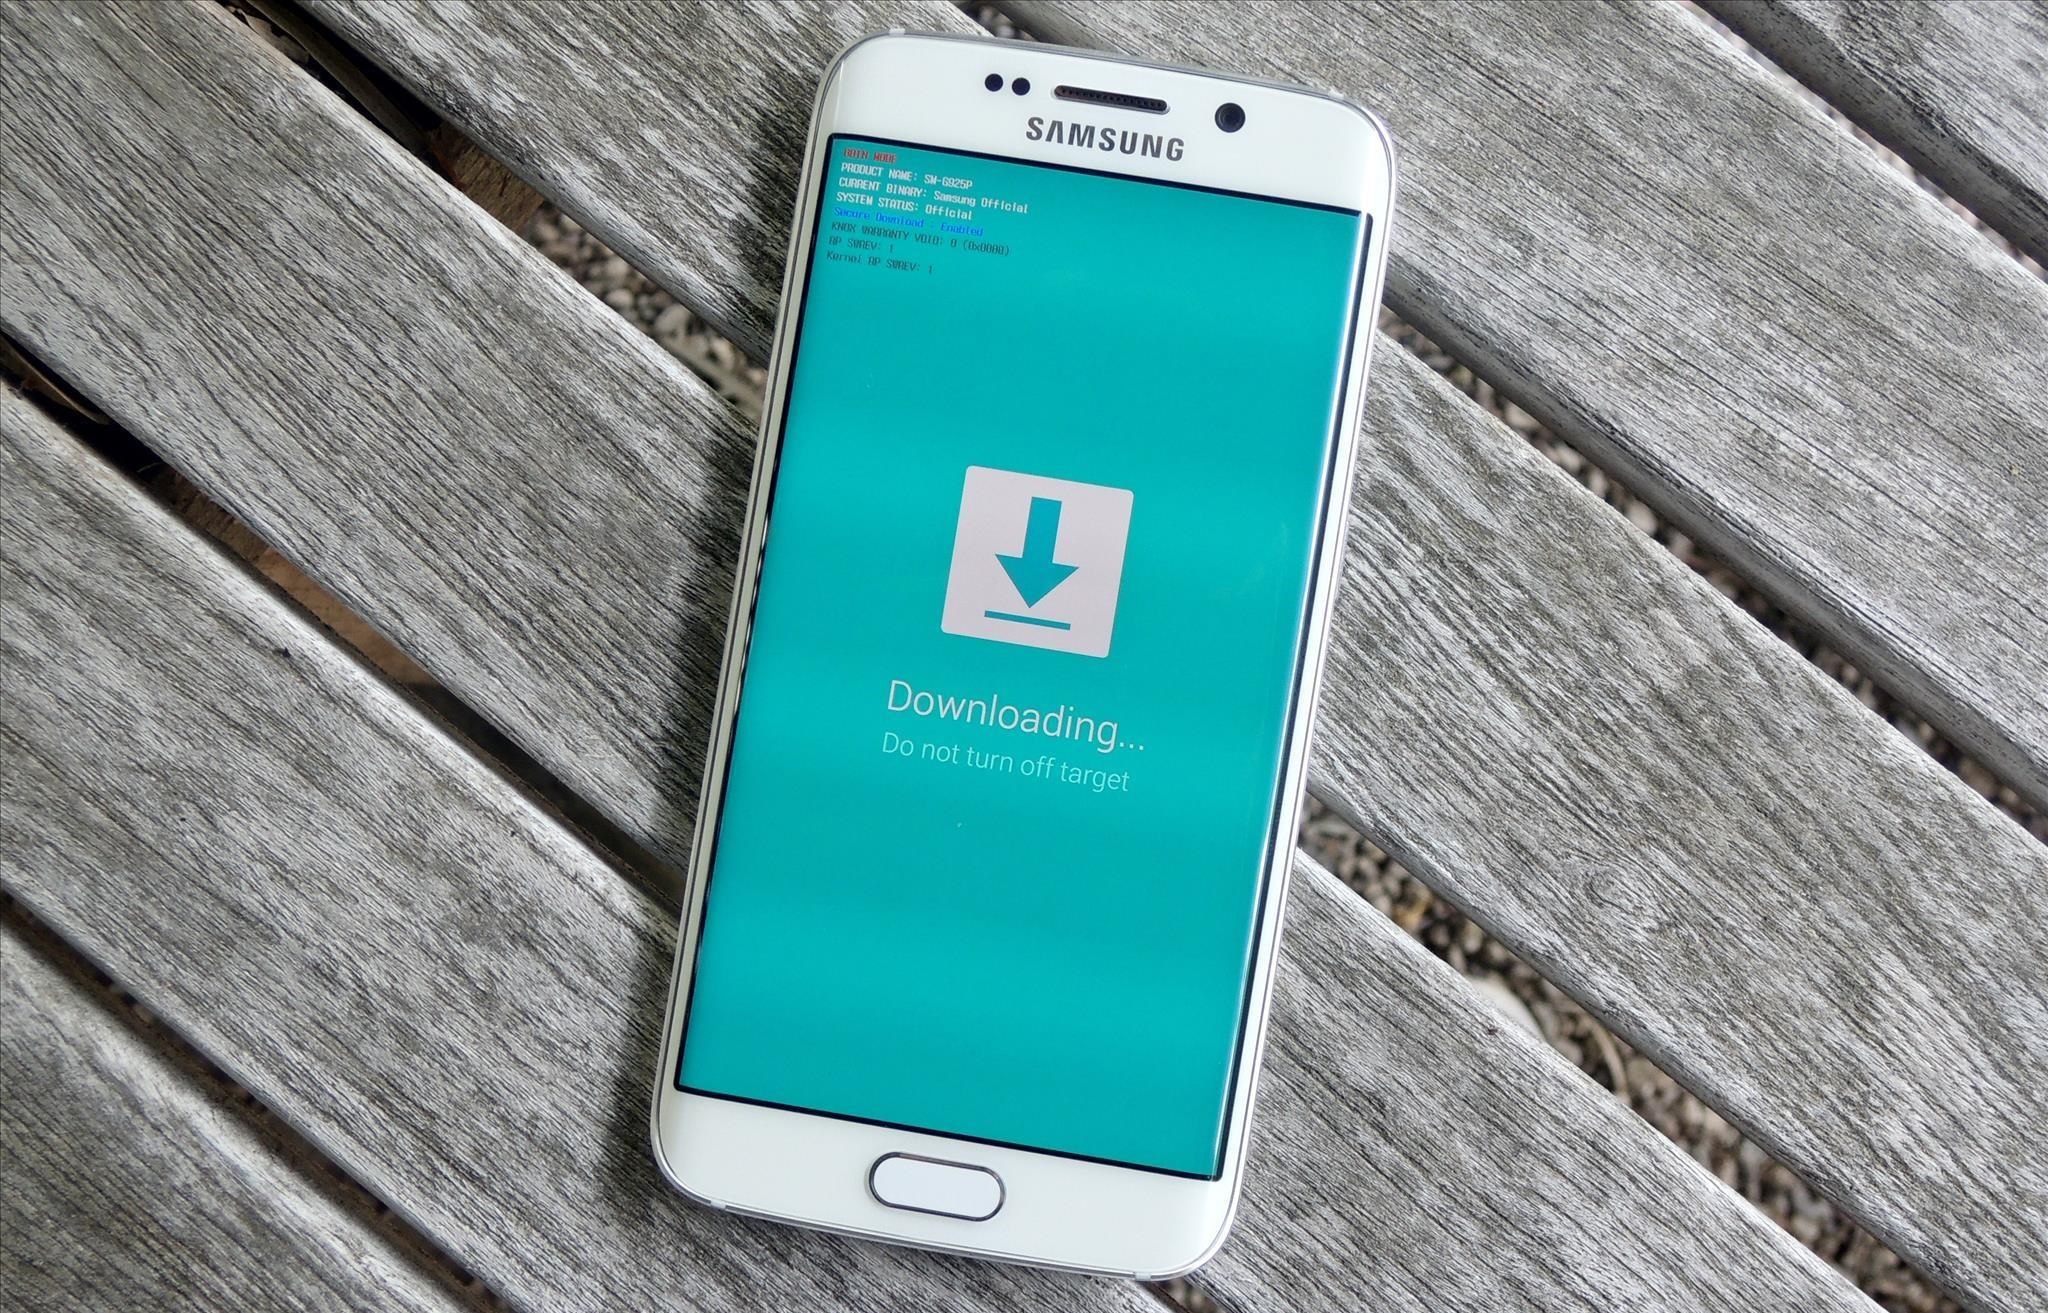
Step 3: Put the Galaxy S6 into Download Mode
Head over to your Galaxy S6 now and turn it off. Once it’s fully shut down, boot up into Download Mode by holding down Home + Power + Volume Down buttons at the same time for just a few seconds.
Your display will show a blue screen with a warning sign at the top—proceed to Download Mode by hitting the Volume Up key.
Step 4: Root the S6 Using Odin
Now that your S6 is ready, launch Odin (right-click and select “Run as administrator”), then connect your S6 to your computer via USB. Also, be sure that you’ve enabled USB debugging on your phone.
In Odin, make sure that the box under ID:COM is blue (1), which means your device has been recognized. If not, try re-connecting your device. Once you’re sure it’s connected properly, click on the AP button (2) and choose the MD5 file you extracted earlier (which should be on your desktop). Finally, just hit Start (3) to begin the process.
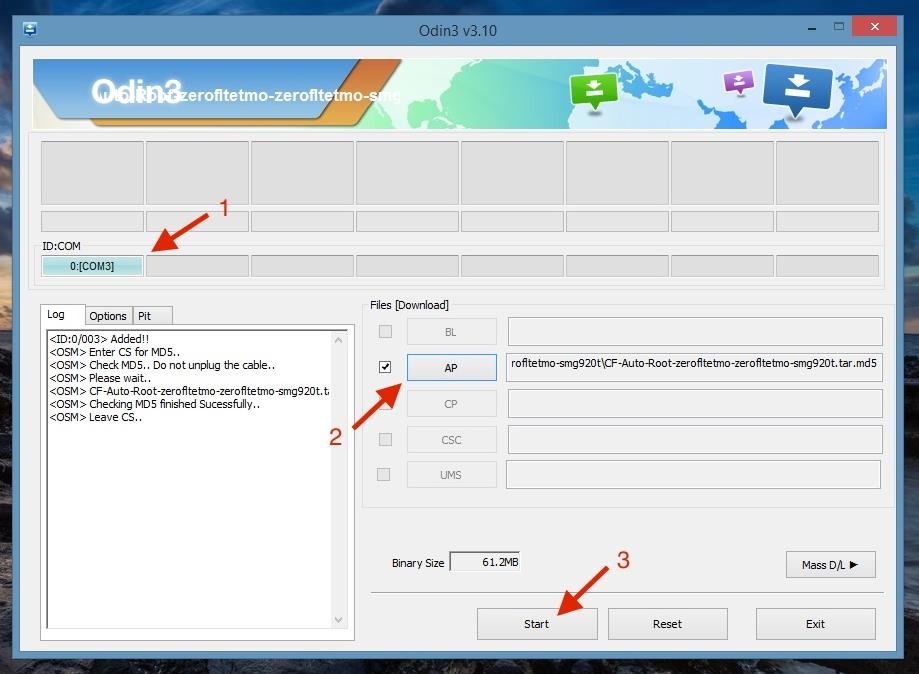
In short order, if everything went according to plan, your device will reboot automatically and you can disconnect it from your computer.
Your Galaxy S6 or Galaxy S6 Edge will now be rooted! Verify root access by using an app like Root Checker.

In case you run into any problems, leave us a comment below and we’ll try and help you out with the process.
Stay connected