
Google USB Driver is a downloadable component in Android Studio and is available from Android SDK Manager. The Google USB Drivers are available for Windows OS and are not required for Mac; for Linux systems, there is a workaround to install them. Here you can download Google USB Driver Package for Windows 10, Windows 7, Windows 8, Windows 8.1, and Linux systems and find complete instructions on how to install them manually.
Google USB Driver doesn’t include ADB and Fastboot Drivers, you need to install them separately – follow the instruction here on how to install ADB and Fastboot Drivers. The Google Android USB Drivers helps in making two hardware devices (Android Device and PC) communicate/connect with each other.
If you already have installed Android Studio on your Windows PC, then chances are that you already have these drivers installed. These Android drivers are updated frequently adding compatibility for more and more Android devices. It is always a good idea to have the latest version of these drivers installed on the system.
Download Google USB Drivers for Windows
There are two methods to install Google Android USB Driver on a Windows PC. The drivers come bundled with Android Studio and are also available as a separate package, for the users who don’t want to install Android Studio for the purpose of installing these drivers.
Method 1: Download and install Google USB Driver Package manually on Windows 10/7/8/8.1
Step 1: Download the latest Google USB Driver Package (latest_usb_driver_windows.zip) from here.
Step 2: Extract the Zip package to obtain “android_winusb.inf ” and other driver files.
Step 3: Connect your Android device to PC.
Step 4: Open “Device Manager” and look for your Android device. It will be listed under “Portable Devices” or under “Other devices“.
Step 5: Once you have found your device, select it and right click. From the list of options choose “Update driver” or “Update Driver Software“.
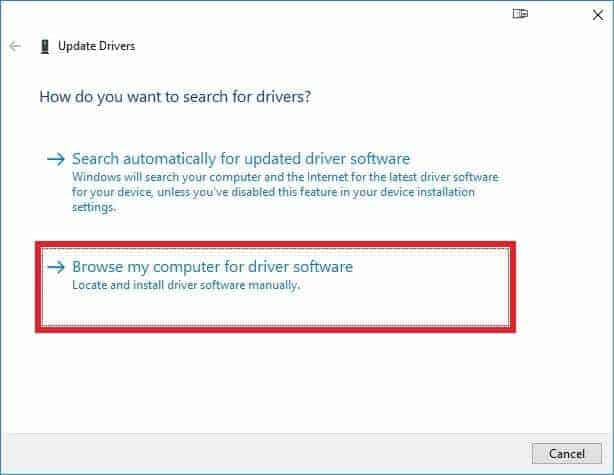
Step 6: Hardware Update wizard should launch. In the wizard choose “Browse my computer for driver software” -> “Browse” -> “Select the folder where you have extracted the drivers” -> “OK“.
Step 7: Click “Next” and follow the onscreen instructions to install the driver.
Method 2: Install Google USB Driver from Android SDK Manager (Android Studio)
Step 1: Download and Install Android Studio on your PC. [Link]
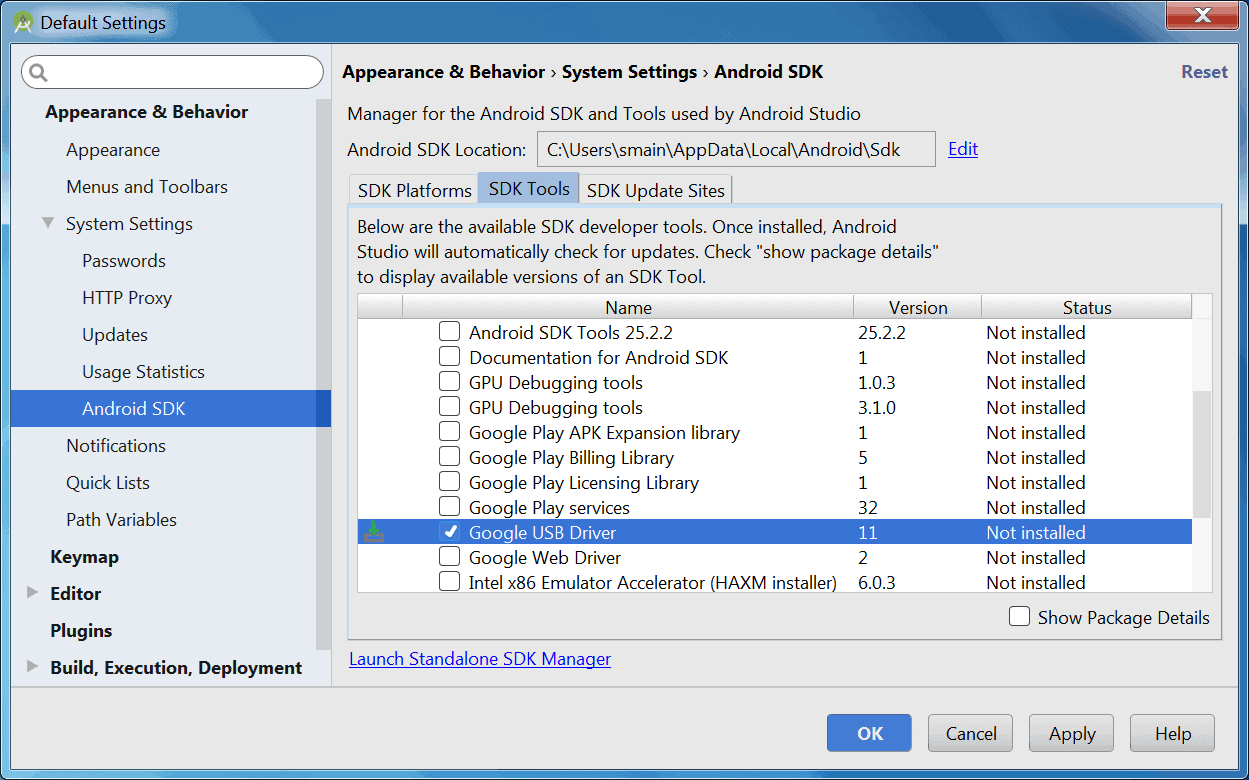
Step 2: Run Android Studio and click on “Tools” -> “SDK Manager“.
Step 3: Click on the “SDK Tools” tab and select “Google USB Driver” and click “OK“.
Step 4: The Google USB Driver Package should now download and install. When done, the driver files are downloaded into the android_sdk\extras\google\usb_driver\ directory.
Download Google USB Driver for Mac
Mac OS doesn’t require the Google Android USB Drivers to be installed. They are readily available and no extra work is needed to make them work. Just connect your device to Mac and it will be detected automatically and you can start transferring Media and other files to and from Mac to Android device.
Download Google USB Driver for Linux
To install the Android drivers on Ubuntu Linux follow the instructions listed below.
Step 1: Open Settings app and enable USB Debugging from Developer Options on your device. If the Developer Options are missing, go to About Phone and tap on Build Number for 7-10 times.
Step 2: Once the USB Debugging option is enabled, connect the device to the Ubuntu Linux system.
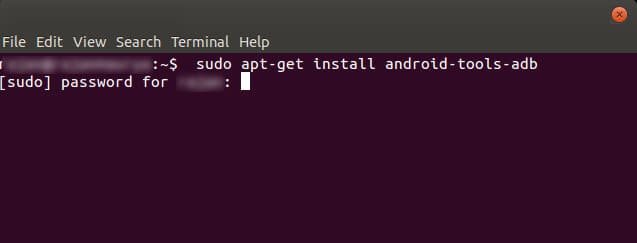
Step 3: Run terminal and enter the below command
apt-get install android-tools-adb
The above command will install ADB and Fastboot drivers along with Google USB Drivers on Ubuntu Linux.
This was the complete tutorial on how to install Google USB Driver on Windows, Linux, and Mac. If you have any queries, do let us know in the comment section.